How to Make Money with Gardening
Table of Contents []
- How To Make Money From Gardening
- Make Money By Selling Flowers/Vegetables
- Landscaping and Garden Design
- Become an Online Gardening Tutorial Instructor
- Create Gardening Products/Services
- Final Word
- How To Start A Gardening Blog
- Tips for Starting a Gardening Blog
- In Summary
- How To Start Container Gardening
- Choose the Right Materials
- Be Mindful Of Plant And Container Size
- Climate Is Important Too
- Be Creative and Have Fun
- Brief Recap
- How To Use Coconut Coir In Gardening
- Features and Benefits of Coconut Coir in Gardening
- 2-4 Case Studies of Coconut Coir In Gardening
- FAQ's about Coconut Coir in Gardening
- Mistakes People Make with Coconut Coir in Gardening
- Best Practices for Coconut Coir in Gardening
- Conclusion
- How To Use Kitchen Waste Water For Gardening
- How To Wash Gardening Gloves
- 1. Last Wearings: Pre-Wash Prep
- 2. Choosing the Right Detergents
- 3. Cold Water is Key
- 4. Rinse and Dry
- 5. Avoid Automation
- Final Word
- What Size Is A Garden Hose Fitting
- Why Does Garden Hose Fitting Size Matter?
- How To Measure For A Garden Hose Fitting
- Garden Hose Fitting Installation
- Insight
- What Is The Size Of A Garden Hose Fitting
- Different Sizes of Garden Hose Fittings
- Different Types of Garden Hose Fittings
- In Summary
- How Long To Run Soaker Hose For Vegetable Garden
- Types of Vegetable Gardens and Size
- Climate and Soil Type
- Mulch and Compost
- Brief Recap
- How Many Gallons Per Hour Garden Hose
- Features of a Garden Hose
- Conclusion
- How Many Gallons Per Hour Is A Garden Hose
- How Many Gallons Per Minute Garden Hose
- Hose Length & Diameter
- Fitting Type
- Nozzle Type
- Pressure Compensator Valve
- Water Volume Capacity
- External Connectors
- Force of Water Flow
- Water Shut-Off Valves
- Final Word
- How Many Gallons Per Minute Is A Garden Hose
- Understanding the Basics of Water Flow Rates
- Factors That Affect Water Flow Rate
- Best Practices and Tips
- Insights
- How To Cut A Garden Hose
- How To Cut A Garden Hose
How To Make Money From Gardening
Making Money From Gardening
Gardening is not just a hobby for many, it can also be a very profitable profession. This article will explore different ways to make money from gardening, the importance and benefits of doing so, and potential challenges.
Make Money By Selling Flowers/Vegetables
One of the most popular and straightforward ways to earn money from gardening is by growing and selling flowers or vegetables. You can sell at local markets, farmers markets, or even through your own webshop. Selling flowers and vegetables can be financially rewarding, and it is a great way to connect with people in your local community. When it comes to selling flowers and veggies, the more diverse your selection, the better. You can grow a variety of exotic plants, vegetables, and herbs, to make sure that your garden stands out and attracts customers.
Landscaping and Garden Design
Another lucrative way to make money from gardening is to provide landscaping and garden design services. If you have a knack for landscape design, you can help clients create beautiful outdoor spaces. You can also offer to install sprinklers, lighting, and other features. Landscaping and garden design can be a great way to make money from your gardening skills. You can charge clients for your consulting services, as well as the installation and maintenance of their outdoor living space.
Become an Online Gardening Tutorial Instructor
If you've had success with your own gardens and are knowledgeable on the topic, teaching others how to do the same can be not just rewarding but is also a great way to make money from gardening. You can offer online tutorials, creating courses and materials related to gardening. This could be anything from a basic introduction to gardening to growing specific plants and vegetables. You can also create podcasts and videos to further reach your potential students.
Create Gardening Products/Services
If you're an entrepreneur at heart, creating gardening products and services can be a great way to make money from your passion. You might create products like ornamental planters, sculptures, and outdoor furniture, or create services like landscaping, lawn care, and garden maintenance. You can also create natural beauty products with elements from your garden, like soap, lotion, and essential oils. Depending on what products and services you decide to offer, the potential for making money from gardening is limitless.
Final Word
There are many ways to make money from gardening. From selling flowers and vegetables to creating gardening products and services, the possibilities are endless. With dedication and the right knowledge, you can find success by turning your garden into a business. Best of luck!

How To Start A Gardening Blog
How to Start a Gardening Blog
Alongside its relaxing effects and appreciation of nature, gardening has become a popular hobby for many during challenging times.
Tips for Starting a Gardening Blog
Know Your Target Audience
Your blog's success will depend on the audience that you're catering to. Start by identifying the topics you plan to cover, as well as your target demographic. Are you planning to share DIY tips for beginner gardeners? Or will you focus more on advanced gardening trends and topics?
Choose the Name and Theme for Your Blog
Much like any other brand, you'll need a name for your blog. Spend some extra time thinking of one that's timeless and memorable. You'll also need to decide what type of platform you're going to use. Fortunately, web hosting companies offer a variety of pre-built themes that are easy to customize, so take some time to play around with them.
Research Your Competition
You should also take some time to see what your competitors are doing. Follow their blogs, and pay attention to their content and marketing strategies. Doing this will help you get a better understanding of what's working and what may not be.
Create Quality Content for Your Audience
Content is the most important aspect of any blog. Start by creating an initial content plan, and then compile a selection of posts that you can use as blueprints for any new content.
Improve Your SEO
Having quality content is great, but you won't be able to reach your target audience unless you have a strong SEO strategy in place. Spend some time reading up on SEO tactics, and consider using a tool such as SEMrush to help you track your progress and execute targeted SEO strategies.
Engage With Your Audience
Engaging with your audience is also critical for the success of your blog. This doesn't necessarily mean that you should respond to every comment or message. Instead, focus on creating engaging content that your readers will want to comment on and share.
Monetize Your Blog
If you plan to make money from your blog, you'll have to find ways to monetize it. You can do this by offering sponsored content, or you can set up a Patreon account for people who'd like to support your work.
Evaluate and Improve Your Performance
Finally, be sure to analyze how your blog is performing. Use analytics tools such as Google Analytics to track how people are interacting with your blog and if there are any areas that need improvement.
In Summary
Starting a gardening blog involves more than just writing about your experiences in the garden. You also need to know who your target audience is, choose a blog name and theme, research your competition, create quality content, and have a strong SEO strategy. Additionally, you may want to monetize your blog and regularly check how it's performing. Following these tips will help you turn your gardening blog into a source of inspiration.
How To Start Container Gardening
How To Start Container Gardening
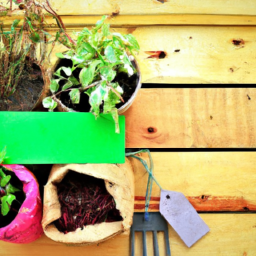
Container gardening offers an opportunity to expand your limited garden space, or to garden with little to no available ground at all. If you are looking to jump into container gardening with both feet, or to get a fresh start with a manageable and accessible gardening activity, you should consider the following tips to get the most out of your project.
Choose the Right Materials
The material you pick for constructions your containers to garden in is of utmost importance and will greatly affect the kind of plants you choose as well as the size and number of containers you select. Plastic, metal, wood, and fabric are all potential materialseach with its pros and cons. Plastic is lightweight but can crack in extreme temperatures. Metal is strong but doesn't allow plants to breathe as freely. Wood and fabric come in a plethora of shapes and sizes for almost any gardening need but can be more work to make and keep in good condition. Additionally, each material requires different measures for soil preparation.
Plastic Containers
Plastic containers and pots are lightweight and easy to move, making them ideal for smaller plants that won't put a lot of strain on the materials. They typically have a short life span due to cracking and discoloration, but can be a great and affordable option for anyone just getting started. Additionally, you can find plastic containers in almost any shape and size.
Metal Containers
Metal containers and pots are heavier and less prone to wear and tear. Due to the non-breathable material, however, water and oxygen are more easily retained, leading to rapidly draining water from the soil. This means that soil must be prepared in a different way with metal containers, often including mixtures and mixes to promote water drainage. Usually a bit more expensive than plastic, metal containers make a more secure and stronger option for any gardeners concerned about damage or longevity.
Wooden Containers
Wooden containers and pots are aesthetically pleasing, often stylish in look and structure. Since they are porous, they are best utilized for smaller plants such as succulents and herbs. You will need to invest in a few drops of waterproof sealant to keep them from rotting. They do require more attention and may need to be replaced more often than those constructed from a stronger material.
Fabric Containers
Fabric containers and pots are also lightweight and very versatile, making them a great choice for almost any small plant. As with any container, however, you should plan ahead and be prepared for maintenance the fabric will requirewaterproof sealants, etc. They come in a wide variety of colors and styles and are an excellent option for limited space.
Be Mindful Of Plant And Container Size
Depending on the plants you choose, size will be an important factor when it comes to selecting the right container and the appropriate soil mixture. Plants with spreading roots, such as tomatoes or cucumbers, will require containers with more space for them to thrive. On the other hand, plants that require less space, such as succulents, can be planted in shallow and narrow containers.
Climate Is Important Too
Climate is a factor that gardeners should consider when starting container gardening. Depending on the type of plants you are growing, you should also consider the season and its effects on your plants and your environmentwhat is the temperature like? How much precipitation does it receive? How much sun? All these factors will be important in determining whether or not the plants you choose will flourish in their given container and environment.
Be Creative and Have Fun
Though it may seem like a daunting task, container gardening can be incredibly rewarding. When it comes to materials and design, there are so many creative options available. From miniature gardens to teacup gardens, the options are limitless. Be sure to have fun and experiment with different ideas. You can also look up different container gardening guides online or check out some books from your local library.
Brief Recap
Container gardening offers an exciting way to expand your current garden or to garden with little space. When selecting materials, consider the pros and cons of plastic, metal, wood, and fabric. Be mindful of plant and container size, as well as climate, in order to ensure the best results. Lastly, make sure you have fun and get creative with your design.
How To Use Coconut Coir In Gardening
How To Use Coconut Coir In Gardening
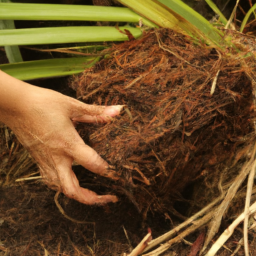
Gardening is an enjoyable activity that can help you create beautiful outdoor environments while also involving you in the processing of soil and plants. As a gardener, it's important to choose the right materials for your garden, including the right soil amendment and potting medium. One such material is coconut coir, which is becoming increasingly popular as a soil amendment and potting medium. In this article, we'll take a deep dive into how to use coconut coir in gardening, discussing the features, benefits, pros and cons, case studies, FAQs, common mistakes people make, best practices, and more.
Features and Benefits of Coconut Coir in Gardening
Coconut coir is made from the tough, fibrous outer husk of coconut. It's usually sold compressed into bales or blocks, or can be bought pre-mixed into soil mixes. It has a neutral pH, is easy to re-wet and break up, and is very lightweight. It's a great amendment for soils with poor structure or drainage, as it's made up largely of course materials including sand, silt, and other natural elements. The primary feature of coconut coir is its water-holding capacity, meaning it can absorb and hold more water than other soil amendments. This makes it very effective in preventing water loss and creating better plant growth. It's also rich in nitrogen, making it a great fertilizer for plants.
Pros and Cons of Coconut Coir for Gardening
When considering which soil amendment or potting medium to use, it's important to take into account both the pros and cons. In the case of coconut coir, the pros are:
- Very lightweight and easy to transport
- Good water-retentive capacity, meaning it retains water longer
- Neutral pH, making it suitable for all plants
- Believed to improve plant health and increase its yield of fruits and vegetables
- A good source of nitrogen for plants
On the other hand, the cons associated with coconut coir include:
- It is expensive and not available everywhere
- Does not contain many trace minerals
- Not a suitable fertilizer on its own
- May contain salts that may be harmful to plants
- Does not provide any organic matter
2-4 Case Studies of Coconut Coir In Gardening
One of the best ways to learn about the effectiveness of coconut coir in gardening is to look at case studies from experienced gardeners:
Case Study 1: Organic Vegetable Gardening in Florida
In this case study, the gardener, who lives in Florida, was using regular potting soil for his organic vegetable garden. He decided to mix in some coconut coir to improve the soil's water retention and to add some nitrogen. He was pleased with the results, noting that his vegetables grew much better and that he had to water them less often.
Case Study 2: Tomato Gardening in California
This gardener was growing tomatoes in his backyard in California and was looking for a way to keep the soil from drying out too quickly. He mixed in some coconut coir to his potting mix and was pleased to find that it had a good water-holding capacity and improved the yield of his tomatoes.
Case Study 3: Aquaponics Gardening in Hawaii
The gardener in this case study was experimenting with aquaponics gardening in Hawaii. He was using a hydroponic system and needed a substrate that would retain water effectively. After trying multiple substrates, he settled on coconut coir, which was perfect for his system, as it had a good balance of water-holding capacity and its ability to create air channels in the water.
FAQ's about Coconut Coir in Gardening
Q: Is coconut coir only useful for gardening?
A: No. Coconut coir is also a great soil amendment for landscaping and container planting. It's also used in hydroponic systems as a hydroponic growing medium.
Q: How is coconut coir different from peat moss?
A: The main difference between coconut coir and peat moss is that coconut coir is a renewable resource, while peat moss is a slow-growing, nonrenewable resource. Coconut coir is also much lighter, and is easier to transport, than peat moss, making it a good choice for gardeners who want to amend their soil without having to lug heavy bags of soil around.
Q: What type of plants can I grow with coconut coir?
A: Coconut coir can be used to grow a variety of plants, including vegetables, herbs, flowers, and trees.
Mistakes People Make with Coconut Coir in Gardening
When using coconut coir in gardening, it's important to avoid common mistakes that can lead to poor plant growth and health. Some of these mistakes include:
- Buying low quality coir, which may contain contaminants or salts that can harm plants
- Using too much coconut coir, which can disrupt the soil's balance of minerals and nutrients
- Not mixing the coir into the soil properly, which can lead to poor drainage and poor plant growth
- Planting seeds directly in coir without making sure the soil is well-aerated and well-drained
Best Practices for Coconut Coir in Gardening
Gardeners can maximize the effectiveness of coconut coir in gardening by following these best practices:
- Always buy high quality, organic coconut coir from a reputable source
- Mix the soil with other soil amendments to help create well-balanced soil
- Make sure to mix the coir thoroughly into the soil
- When using coconut coir as a hydroponic growing medium, make sure to add fertilizers and other nutrients to ensure the health of the plants
- Test the pH of the soil after adding the coconut coir and make adjustments as necessary to achieve the desired pH level
Conclusion
Coconut coir is an increasingly popular soil amendment and potting medium for gardeners, and can be used in a variety of ways to create optimal soil for all types of plants. When using coconut coir, it's important to always buy high quality material, mix it thoroughly into existing soil, and adjust pH levels as needed. Utilizing the best practices listed here, gardeners can create beautiful outdoor spaces that will last for years to come.
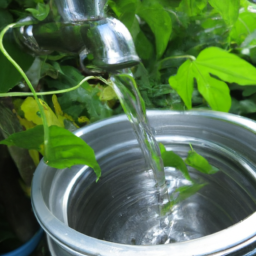
How To Use Kitchen Waste Water For Gardening
Introduction
Figuring out how to use kitchen waste water for gardening can be an intimidating task. With so many options available, it's hard to know where to begin. However, by understanding a few key topics, you can get started on the right foot. In this article, we'll take a look at eight topics that are essential to getting started with kitchen waste water usage in your garden.
We'll examine popular subtopics like water conservation and resource management, how to properly manage kitchen waste water, the risks and benefits of using kitchen waste water, and more. Additionally, we'll discuss the best practices for safely using kitchen waste water in your garden while minimizing the potential risks. Let's dive in and learn more!
Topic 1: Water Conservation & Resource Management
Water conservation and resource management are key considerations when looking to use kitchen waste water for gardening. Before embarking on the process, it is essential to understand the principles of effective water management.
The first step is to reduce the amount of kitchen wastewater produced. This can be accomplished by changing the water consumption habits of family members. Activities such as shutting off the faucet when brushing teeth, taking shorter showers, and washing dishes with a sink full of soapy water instead of running the faucet while washing are all ways to reduce the amount of kitchen wastewater produced.
It is also important to ensure that the wastewater is treated to reduce potential contaminants. Many municipalities offer wastewater treatment programs, but for those who do not have the option, other solutions such as home water treatment systems can be explored. This will help make sure the water is safe for use in the garden.
Topic 2: How to Properly Manage Kitchen Waste Water
It is important to develop a system for the efficient management of kitchen waste water if it is to be used for gardening. This can include using a system such as a compost bin or a dedicated outdoor container to collect and store the wastewater.
It is important to note that wastewater should not simply be poured onto the ground as this can pollute local water sources. A compost bin with a lid is a great solution for those who have the space, but small outdoor containers can also be used as long as the cover is secure.
To ensure that the water is properly treated, it can be mixed with fertilizers or soil enhancements. It may also be necessary to aerate the waste water to reduce the levels of nitrogen and other pollutants and reduce the wastewater's smell.
Topic 3: Risks & Benefits of Using Kitchen Waste Water for Gardening
The risks and benefits of using kitchen waste water for gardening will depend largely on how the water is managed and treated. Proper management and treatment are essential for minimizing potential risks while maximizing the benefits.
On the positive side, kitchen waste water can help to enhance the soil while at the same time reducing the amount of water required for gardens. The wastewater can also be used to fertilize and enrich the soil, leading to healthier and better-looking plants.
On the downside, it is important to be aware of any potential contaminants present in the wastewater that could be dangerous to both human health and the environment if released untreated or improperly managed.
Topic 4: Best Practices for Safely Using Kitchen Waste Water in Your Garden
When looking to use kitchen waste water in the garden, it is important to follow best practices to ensure the safety of both human health and the environment.
The first step is to test the water for any potential contaminants. Home water test kits are widely available and can help identify any potential hazardous materials in the wastewater.
Next, it is important to ensure that the wastewater is properly treated before it is applied to the garden. Aerating the water, mixing it with soil and fertilizers, and allowing it to settle are all simple methods for making sure the wastewater is safe to use.
Finally, it is important to carefully track the levels of wastewater used in the garden. Too much wastewater can damage plants and lead to an unhealthy garden.
Conclusion
Using kitchen waste water for gardening can be a great way to reduce water consumption while at the same time enriching the soil. However, it is important to be aware of the risks and ensure that the water is properly managed and treated before use. By understanding the topics outlined here and following the best practices for safely using kitchen waste water in the garden, you can create a successful and sustainable garden that not only looks great but is also environmentally friendly.
How To Wash Gardening Gloves
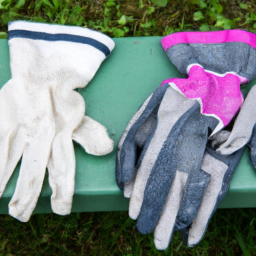
Essential Guide to Washing Gardening Gloves Properly
Gardening is one of the most popular home activities; done in the backyard or even indoors to enjoy the aesthetic beauty of plants and flowers. Gardening involves many gardening supplies and accessories such as gloves that ensure safety and hygiene. Washing gloves after every use is essential to ensure that they remain durable and serve their purpose for a long time. Here is an in-depth guide to washing gardening gloves properly.
1. Last Wearings: Pre-Wash Prep
Before washing any gardening gloves, it is recommended to consider what products were used or what objects were handled during their last use. This involving checking if any potentially toxic substances were used such as fertilizers, insecticides, and herbicides. If any such products or substances were used, it is best to thoroughly rinse the gloves before washing them. One should ensure pre-rinsing and washing off any chemical residues to limit their damage when put in the washing machine.
2. Choosing the Right Detergents
It is best to use a mild detergent or even dishwashing soap while cleaning gardening gloves because they are composed of materials such as leather, latex, and polyester that can be damaged with powerful detergents. Any detergent that is mild and non-abrasive should be used. Moreover, it is recommended to stay away from stain removers or bleach as they can weaken some materials used in the composition of gloves and damage them beyond repair.
3. Cold Water is Key
Washing gloves with any temperature except cold water can prove to be a hazard to their overall material. Different materials used in making gloves can be damaged if they are exposed to high temperature or hot water. It is important to note that the water should not just be cold but also lukewarm when washing gardening gloves. This is to ensure that the dirt gets loosened before taking the gloves out for further cleaning. Hot water or water with a high temperature disrupts garden gloves and makes them weak.
4. Rinse and Dry
Adding a few tablespoons of vinegar in the water can help in rinsing off gardening gloves and make sure no chemical residues remain behind. This may be an optional step and must be avoided altogether if detergents were used while washing Gardening gloves. After rinsing, hang the gloves in shade or warm place to dry off as exposing them to sunlight can damage the gloves. If the gloves are made of leather, one should consider applying a degreaser or leather conditioner after they have completely dried.
5. Avoid Automation
It is best to avoid automatic washing machines even if the gloves fit into the drum. Garden gloves are delicate and meant for manual washing. If the gloves are too large to fit in a sink, one can find a large container or bucket to wash them with hands. It is best to not use tumble dryers for drying gloves either as the excessive heat can damage the material.
Final Word
Properly washing Gardening gloves is essential for their longevity. Following this guide can save a considerable amount of money and ensure safety against any potentially toxic residues that can enter the human body through the skin. While washing, make sure to pay attention to the materials that were used for the gloves and the temperature of the water to avoid any unnecessary damage to the material.
References:
What Size Is A Garden Hose Fitting
What Is A Garden Hose Fitting?
Garden hoses are essential for watering gardens, cleaning the driveway, and washing cars. Garden hose connectors, also known as garden hose fittings, are essential in ensuring that your hoses are securely attached to your faucets, watering nozzles, and other garden hose fixtures. The size of the fitting you need will depend on a number of factors. In this article, we will explore what size garden hose fitting is typically used, how to determine the correct size, and how to install different types of fittings.
Why Does Garden Hose Fitting Size Matter?
The majority of garden hoses sold in the United States come in standard 3/4-inch sizes. This size hose will easily fit standard garden hose fixtures. If your faucet or nozzle has an odd size, such as 1/2-inch or 1-inch, you will need a special fitting to ensure that the connection is secure.
Adapters and Connectors
Basic adapters and connector fittings can be used to adjust the size of the hose as needed. These are sold in sets, usually with two or three pieces in the set. Simply attach a piece to the hose on one side, and the other piece to the faucet or nozzle on the other side. If necessary, adjust the overall length of both pieces to ensure a secure fit.
Compression Fittings
Compression fittings are a type of specialized fitting that is designed to attach two hoses together in an easy manner. Compression fittings are typically more durable than the basic adapters, and they can be used for both standard and odd sizes. In order to install compression fittings, tighten one part to the hose and then tighten the other part to the faucet or nozzle. You may need a wrench to tighten the compression fitting properly.
How To Measure For A Garden Hose Fitting
To determine the size of your hose fitting, you will need to measure the thread type on your faucet or nozzle. This is easily done with a thread gauge. Place the gauge on the threads and turn it until it fits snugly. The thread type is indicated on the gauge; standard garden hoses use a 3/4 inch thread type. If you have an odd size, then you will need to find an adapter or compression fitting that has your desired size.
Garden Hose Fitting Installation
Once you have identified the correct size, installing your garden hose fitting is relatively simple. Adapters and connectors will come with instructions; simply follow the instructions to attach them to both the hose and the faucet or nozzle. Compression fittings require slightly more effort; you will need to use a wrench to make sure that the fitting is secure.
Insight
Garden hose fittings are a necessary part of garden hose maintenance. Understanding your fittings, their sizes, and how to install them is important for ensuring a secure connection. The majority of garden hoses use a 3/4 inch thread type; however, if you have an odd size, adapters or compression fittings can easily be used to adjust the size of the hose.
What Is The Size Of A Garden Hose Fitting
What Is The Size Of A Garden Hose Fitting?
Garden hoses are an essential part of any gardening enthusiast's supplies, used to water their plants or fill up water tanks, but what is the size of a garden hose fitting? This guide will outline the different sizes of garden hose fittings and what to consider when purchasing one.
Different Sizes of Garden Hose Fittings
The most commonly used garden hose fittings are inch and one inch in size, but other sizes do exist. Here are the various sizes available on the market, listed in order of size:
- inch
- 3/8 inch
- inch
- inch
- One inch
- 1 inch
- 1 inch
- 2 inch
Factors to Consider When Buying a Garden Hose Fitting
Before making a purchase, it is important to keep the following factors in mind:
- Hose size - Be sure to buy a fitting that matches the existing size of your hose. If you are buying a new hose with the fitting, check the size of the fitting that comes with the hose and buy an appropriate fitting.
- Environment - Consider the weather conditions in the area that the hose will be used and buy a hose and fitting accordingly. If the temperatures in the area are typically hot, go with a hose and fitting that are made of heat-resistant material.
- Durability - Ensure that the garden hose and its fitting are made from a durable material, such as copper, brass, or stainless steel, in order to ensure that they will last for a long time.
Different Types of Garden Hose Fittings
Garden hose fittings can come in various materials and designs. Here are some of the most common types available on the market:
- Brass fittings - Brass fittings are the most common type of hose fittings and are known for their durability and strength. They can also be used in colder climates, as they won't freeze due to their heat resistance.
- Stainless steel fittings - Stainless steel fittings offer superior corrosion resistance and durability, meaning they can last for a long time. They are more expensive than brass fittings but are worth the cost due to their longevity.
- Plastic fittings - Plastic fittings are the cheapest option, but are not as strong or durable as the other types of fittings. If the hose is going to be used in a mild climate, plastic fittings are a good option.
In Summary
When it comes to garden hose fittings, there are several different sizes and types available on the market. The most popular sizes are inch and one inch, but there are other sizes available. It is important to consider the climate, durability, and size of the hose when selecting a fitting. Brass, stainless steel, and plastic fittings are the most common types.
By keeping the factors outlined above in mind, you can find the perfect garden hose fitting for your water delivery needs, allowing you to enjoy a beautiful garden with a healthy supply of water.
How Long To Run Soaker Hose For Vegetable Garden
How Long To Run Soaker Hose For Vegetable Garden: An Enlightening Prelude
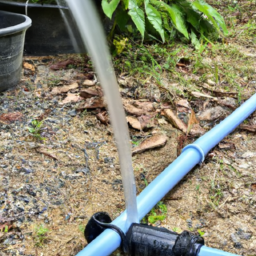
Drip irrigation is an efficient way to give water to a vegetable garden. In this article, we'll be focusing on the length of time one should let a soaker hose run in order to effectively water the plants without wasting water. We'll look at factors like the size of the garden, the types of plants in the garden, and the climate amongst other factors. So, without further adieu, let's get started!
Types of Vegetable Gardens and Size
The first consideration when figuring out how long to run a soaker hose in your vegetable garden is the size of the garden itself. Generally, larger gardens take longer to soak properly, as the water has to travel further. There are also other factors such as the type of vegetables planted and the climate. For example, warmer climates require more water than cooler climates, as evaporation is more of a concern in hotter climates.
Raised Beds
Raised beds require special consideration. Since the soil in these beds is higher than the surrounding area, the water needs to soak in deeper to reach the roots of the plants. As a result, you'll need to run the soaker hose longer than you would for a flat garden.
Potted Vegetable Gardens
For potted vegetable gardens, the amount of water needed may be different than for a traditional garden, as plants are in more of a contained environment. Generally, when watering a potted vegetable garden, it is best to water deeply at least once a week. This will ensure that the roots of the plants get enough water.
Climate and Soil Type
The climate and soil type of your vegetable garden will also play a role in how long you should let your soaker hose run. The climate will influence how much water needs to be delivered, as warmer climates require more water to keep plants hydrated. Soil type is important as well, as different soil types may require more or less water. For example, clay soil retains more water than sandy soil, so it may not need to be watered as often.
Light and Shade
Light and shade are important considerations when figuring out how long your soaker hose needs to run. Plants that are in full sun need more water than those that are in part shade, as the sun will cause more evaporation. If your garden is in an area with both full sun and part shade, be sure to adjust the length of watering time accordingly.
Humidity
Humidity also plays a role in how much water your vegetables need. If your garden is in an area with higher humidity, less water is needed, as the humidity slows down evaporation. On the other hand, areas with lower humidity will require more water to keep the plants hydrated.
Mulch and Compost
Mulching and composting can help conserve water in your vegetable garden. Mulch helps slow down evaporation, which means less water needs to be delivered. Compost helps retain moisture, so less frequent watering is needed.
Brief Recap
So, how long should you run a soaker hose for your vegetable garden? The answer depends on a variety of factors, such as the size of the garden, the types of plants in the garden, the climate, soil type, light and shade, and humidity. Mulch and compost can also help conserve water and reduce the amount of time needed to run the soaker hose. With all of these factors taken into consideration, you should be able to determine the appropriate length of time needed for watering your vegetable garden.
Looking Ahead
Now that you have a better understanding of how long a soaker hose needs to run for a vegetable garden, you can make the best decision for your own garden. With the right information, you can be sure to use the right amount of water to keep your plants hydrated and healthy.
How Many Gallons Per Hour Garden Hose
Maximizing Your Garden Water Flow with a Garden Hose
Gardening is one of the most rewarding activities, requiring a great deal of hard work and a lot of water! If you want to make sure you're getting the most out of your garden hose, you're in the right place. Having the right understanding of your garden hose and its features can save you a lot of headaches in the long run. Here we'll explore the following subtopics, in order to give you a full understanding:
Features of a Garden Hose
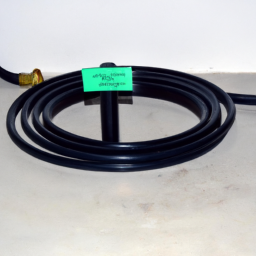
A garden hose is a flexible tube used for delivering water in the garden. It usually comes with a fitting on one end to attach to your spigot and a nozzle on the other end to attach to your sprinkler or watering can. Most hoses are made of reinforced rubber material, a polyvinyl chloride (PVC) tubing, or other synthetic materials. Most hoses come in lengths between 25 and 100 feet, with the most popular length being 50 feet.
Garden hoses come in two types: standard and heavy duty. The standard hose is made for everyday use and is good for a light-duty job. Heavy-duty hoses are made for more intensive garden work. Heavy-duty hoses are usually thicker and more durable, and have a higher water pressure output.
Pros & Cons of a Garden Hose
Pros:
- Easy to use and install
- Flexible for a variety of uses
- Available in different lengths, materials and sizes
- Can be used with a variety of garden tools and accessories such as sprinklers, nozzles, and more
Cons:
- Relatively short lifespan
- Can be easily damaged by the sun
- Can be easily cut or punctured
- May be too large or bulky for small gardens
How Many Gallons Per Hour Does a Garden Hose Flow?
The amount of water that flows through a garden hose depends on a few factors, such as the size and length of the hose, the type of material the hose is made of, and the water pressure that is applied. Generally, a standard garden hose can flow up to 10 gallons of water per minute at over 80 PSI.
Case Studies
Case Study One: Rooftop Garden
A rooftop garden in Los Angeles was designed with a irrigation system to keep the garden lush and green. The garden had to be outfitted with a garden hose to hook up the sprinkler system for watering. The gardeners decided to go with a 50-foot heavy-duty garden hose, to ensure that the water pressure was enough to properly irrigate the garden.
Case Study Two: Flower Garden
A homeowner in Texas decided to plant a flower garden in her backyard. She wanted to keep the garden vibrant and healthy, so she needed to set up an irrigation system. She opted to go with a 25-foot lightweight garden hose, as she knew that the garden didn't require a great deal of pressure.
FAQs
- Do garden hoses come in different lengths?
- Yes, garden hoses come in different lengths between 25 and 100 feet.
- Are garden hoses made of special materials?
- Yes, garden hoses are usually made of reinforced rubber material, a polyvinyl chloride (PVC) tubing, or other synthetic materials.
- How much water can a garden hose flow?
- A standard garden hose can flow up to 10 gallons of water per minute at over 80 PSI.
Mistakes to Avoid with a Garden Hose
- Do not exceed the maximum water pressure limit
- Do not leave the hose lying out in the sun for too long
- Do not leave the hose in the cold for too long
- Do not forget to turn off the water
- Do not leave the hose open for too long without disconnecting it
- Do not leave the hose filled with water
Best Practices for a Garden Hose
- Choose the right hose for the job
- Test the pressure of your hose before use
- Store your hose properly
- Check for any leaks or damages
- Make sure the hose and the spigot are properly connected
- Turn the water pressure down when not in use
- Drain the hose after each use
Conclusion
We hope this article has helped you better understand what goes into a garden hose, and how it can work for you. With this knowledge, you can now make sure you are getting the most out of your garden hose, and ensure that your garden will be lush and healthy for many years to come. Thanks for reading!
How Many Gallons Per Hour Is A Garden Hose
Introduction
Figuring out how many gallons per hour a garden hose can output can become a daunting task. In this article, we will explore 8 to 12 relevant topics regarding finding out the output of water in gallons per hour for a garden hose. We will look at topics such as calculating gallons output, what size garden hose is best used, and more. By the time you are finished reading this article, you will have a greater understanding of how many gallons per hour a garden hose is capable of delivering.
Calculating Gallons Output
The first step in understanding how many gallons a garden hose outputs in an hour is by calculating the gallons output. To begin, it is important to note the size of the garden hose being used, as different sizes will result in different outputs. The most common standard garden hose is 5/8 inch in diameter.
To begin the calculation, first determine the length of the hose being used. Assuming the length of the hose is 100 feet, begin calculations by multiplying the number of feet of the hose by 0.434. So, in this example, the output is 43.4. Next, take the area of a circle and multiply it by the output. For a 5/8 inch diameter garden hose, the area of a circle is 0.309. So, multiplying 43.4 by 0.309 will give you an output of 13.4 gallons per hour.
Best Garden Hose Size
The size of a garden hose is absolutely essential when calculating how many gallons per hour the hose will output. The most common garden hose size is 5/8 of an inch in diameter. This diameter size generally works best with most applications and is widely accepted as a universal size. In addition to the 5/8 inch diameter garden hose, larger sizes such as 3/4 of an inch and 1 inch can be used depending on the demands and applications.
While larger diameter hoses may produce greater outputs of water, the length of the garden hose becomes impacted. Generally, the larger the diameter size the more difficult it is to maneuver and store, this is why the 5/8 inch diameter is the most commonly used size.
Water Pressure and Gallons
It is important to note that the output of water in gallons per hour will vary depending on the amount of water pressure that is coming from the spigot. If water pressure is low, the flow of water will be increased. In the same regard, if the water pressure is increased, the gallons per hour will decrease.
Depending on the water pressure you can expect the following outputs for the sizes noted above:
5/8 inch diameter: With a 40-50 PSI pressure, the output will be 10-13 gallons per hour.
3/4 inch diameter: With a 40-50 PSI pressure, the output will be 16-21 gallons per hour.
1 inch diameter: With a 40-50 PSI pressure, the output will be 23-29 gallons per hour.
Care and Maintenance
When calculating the output of water in gallons per hour for a garden hose, it is important to note the care and maintenance of the garden hose. Cleaning and storing the garden hose in the right way and at the right time is important in maintaining an accurate output.
When cleaning the garden hose, it is important to rinse the hose with water and to ensure that all kinks are out of the hose. A kinked hose will lower the output in gallons per hour. Additionally, when storing the garden hose, it is important to coil it properly and to ensure that it is in a place where it will not freeze in cold weather. Doing all of these things can help in ensuring that the output of water in gallons per hour is as accurate as possible.
Using a GPM Calibrator
If you are looking for an accurate output of water in gallons per hour, consider using a GPM calibrator. A GPM calibrator is a device that can measure the actual flow of water in gallons per minute. Most typically, this type of device is used by municipalities and water services to measure the flow of water in order to ensure that it is accurate.
Using a GPM calibrator is a great way to ensure that the output of water in gallons per hour is accurate. All you need to do is attach the device to the end of the garden hose and let it run for at least a few minutes. After the device has been running for an appropriate amount of time, the GPM calibrator will give you a reading of the actual flow rate in gallons per hour.
Calculator Conversion Charts
In addition to using a GPM calibrator, you can also use a calculator conversion chart to determine the output of water in gallons per hour. This type of chart is useful if you are looking for a general idea of the output and do not need a specific and accurate number.
To use a calculator conversion chart, you will need to know the flow rate of the garden hose in gallons per minute. From there, you will need to convert that number of gallons per minute into gallons per hour. To do this, simply multiply the gallons per minute number by 60. The resulting number will give you a general idea of the output of water in gallons per hour for a given garden hose.
Summary
Figuring out how many gallons per hour a given garden hose can output can be quite the challenge. Fortunately, by following the tips and guidelines discussed in this article, you should now have a better understanding of the output of a garden hose in gallons per hour. From calculating the output to using a GPM calibrator to utilizing a calculator conversion chart, you now have the tools for determining the output of water in gallons per hour for a garden hose.

How Many Gallons Per Minute Garden Hose
Areas of Consideration for Determining How Many Gallons Per Minute Your Garden Hose Can Deliver
When it comes to watering your garden, the age-old question how many gallons per minute can my garden hose deliver must be explored. Whether you're a first-time gardener trying to get an upper hand on you landscape's irrigation, or a seasoned veteran looking for more advanced insight, there are several factors to consider when purchasing and hooking up your hose.
In this article, we'll explore 8-12 central themes designed to help guide you to the right hose and nozzle for your watering needs. For each theme, we'll delve into its background, importance, applications, and potential challenges. Let's get started!
Hose Length & Diameter
The length and diameter of the garden hose vary directly with each other. Generally, the longer the hose is, the smaller its diameter is. The smaller the diameter, the lower the amount of water that it can deliver. So while a 150-foot garden hose may seem like a great purchase, its size may really limit its potential to irrigate effectively.
It is important to select the right size garden hose for your watering needs. Generally, hoses range from (most common size) to 1 diameter. The garden hose is designed to deliver up to 9.5 gallons of water per minute, while the 1 garden hose is designed to deliver up to 25 gallons of water per minute. Knowing this, purchasing the right size garden hose for your needs becomes paramount.
Fitting Type
The fitting type of your garden hose is also important for efficient watering. There are two main types of garden hose fittings hose threaded and pipe threaded. Hose threaded fittings are larger in diameter and designed for greater water flow. Pipe threaded fittings are much smaller in diameter and designed for less water flow.
The fitting type will directly impact the flow rate of the garden hose the input and output of water. If you would like to deliver high amounts of water per minute, then a hose threaded fitting is best. However, pipe threaded fittings are best for delivering smaller amounts of water per minute.
Nozzle Type
Watering your garden is not just about selecting the right garden hose. Equally important is selecting the right nozzle type for your watering needs. The type of nozzle will directly impact the amount of water that is released from the hose, as well as the spread of the water.
The most common nozzle type is the fan or spay nozzle. This type of nozzle emits a wide spray of water, which is suitable for larger areas such as gardens and lawns. The cone type nozzle emits a stream of water, which is suitable for smaller areas such as creating thin lines of water.
Other nozzle types such as the adjustable nozzle and the rotary nozzle are also suitable for specialized watering needs. Adjustable nozzles can deliver a range of gallons per minute, while rotary nozzles are best for creating fine narrow spray patterns.
Pressure Compensator Valve
In addition to selecting a garden hose, nozzle, and fitting, a pressure compensator valve is also important for delivering an efficient flow of water. The pressure compensator valve is designed to reduce the amount of water wasted and increase the overall efficiency of the system.
The pressure compensator valve works by regulating the amount of pressure that is being delivered through the garden hose. By reducing the amount of pressure, it also reduces the amount of water wasted. The pressure compensator valve also helps to prevent water hammer, which is a condition that leads to excessive noise from the hose.
Water Volume Capacity
Garden hoses also come with different water volumes. Generally, the capacity of the water volume is usually determined by the length of the hose. A longer hose will have a larger water volume capacity, but also a smaller flow rate. A shorter hose will have a smaller water volume capacity, but a larger flow rate.
The total water volume capacity can be used to calculate the total amount of water per minute that the hose can deliver. To do this, you need to multiply the water volume capacity by the flow rate. For example, if a garden hose has a volume capacity of 3.78 gallons, then it can deliver up to 28.2 gallons of water per minute.
External Connectors
External connectors are also important for efficient irrigation. External connectors such as quick connects allow for more efficient connection of the garden hose to the faucet or other outlets. This helps to reduce the amount of time required to setup and takedown the watering system.
In addition, external connectors also allow for better water flow through the garden hose. This is because external connectors can help to reduce the amount of water pressure that is lost through the initial connection. As a result, more water will be available for irrigation.
Force of Water Flow
The force of the water flow is also important when determining the amount of water per minute that the garden hose can deliver. As discussed earlier, garden hoses come in different sizes, shapes, and lengths. Each of these factors will directly impact the amount of water that the hose can deliver.
For instance, a garden hose with a larger diameter and length will be able to deliver more water per minute than a garden hose with a smaller diameter and length. Similarly, a garden hose with a force of water flow that is higher than the opposition will be able to deliver more water per minute.
Water Shut-Off Valves
Finally, water shut-off valves are also important for efficient irrigation. Water shut-off valves are designed to prevent the water flow from continuing when it is no longer needed. This helps to reduce the amount of water that is wasted and can thus help to make your water system more efficient.
Water shut-off valves can be manual, such as those that are operated by a lever, or they can be automatic, such as those that are operated by a timer. Automatic valves are best for more complex irrigation systems, as they can be programmed to turn the water on or off at certain times of day.
Final Word
In conclusion, there are a variety of factors to consider when determining how many gallons per minute your garden hose can deliver. Specifically, the length and diameter, fitting type, nozzle type, pressure compensator valve, water volume capacity, external connectors, force of water flow, and water shut-off valves all play important roles in ensuring efficient irrigation. By taking these factors into account when selecting your garden hose, you can ensure the highest water delivery possible.
How Many Gallons Per Minute Is A Garden Hose
How Many Gallons Per Minute Is A Garden Hose?
Understanding the Basics of Water Flow Rates
The amount of water a garden hose can provide in gallons per minute (GPM) will depend on various factors including the diameter of the hose, the water pressure, and any nozzle attachments. The typical garden hose measures 5/8 inch in diameter or 0.625 inches inside. Understanding the size of the hose is important because it will determine the water flow rate.
The larger the hose diameter, the more GPM a hose can supply. Still, the water pressure at the water source will also determine the GPM. The standard pressure from residential water supply systems varies from one area to another. Generally, it is considered to be around 30 PSI. Some water systems can also push up to 100 PSI.
Calculating Gallons Per Minute
A simple way to calculate the GPM is to measure the length of the hose in feet. A standard garden hose is 5/8 inch (or 0.625 inches) in diameter. So, take the length and divide it by 10 to get a good approximation of the GPM. For example, a garden hose that is 50 feet long can deliver around 5 GPM of water.
To get a more accurate measurement, you can also use a flowmeter to gauge the GPM. This will tell you exactly how many gallons per minute the hose is delivering. Flowmeters are available at most hardware stores and online retailers, and they are easy to use.
Factors That Affect Water Flow Rate
Apart from the length and diameter of the hose, there are several other factors that can influence the amount of water that flows through it. For instance, using a nozzle or a nozzle attachment can reduce your water flow rate significantly. This is because the nozzle causes a restriction in the flow of water. The same goes for the use of water filters or hoses with insulation on them.
It is also important to understand the affect of elevation on water flow rate. If the hose is running uphill, gravity is acting against it, and this can reduce the amount of water that flows out of the hose. Conversely, if the hose is running downhill, gravity is working in its favor, and the water flow rate can be increased.
Reducing Water Pipe Volume
If you want to reduce the water flow rate in your garden hose, you can install a water pipe volume reducer. This device works by limiting the amount of water that can flow through the pipe. You can find these at most hardware stores, and they are relatively easy to install. Generally, you just need to screw the device onto the hose and turn the dial to adjust the water flow.
Best Practices and Tips
It is important to be aware of the potential issues that may arise from using a garden hose. Some of the most common issues include leaks, pinholes, and kinks. Not only can these lead to a loss of pressure, but they can also lead to an increase in water costs. To avoid these issues, it is important to check the hose regularly for any signs of wear and tear, and to replace the hose if necessary.
It is also important to use a water shutoff valve when you're done using the garden hose. This will help to conserve water and reduce the risk of flood damage. Lastly, you should avoid stretching or contorting the hose too much, as this can cause it to kink and reduce the water flow rate.
Insights
The amount of water a garden hose can provide in terms of gallons per minute depends on various factors such as the length, diameter, water pressure, elevation, and any nozzle attachments. The most accurate way to measure the GPM is to use a flowmeter. Issues such as leaks, pinholes, and kinks can lead to a loss of pressure and an increase in water bills. It is important to check for any wear and tear regularly and to replace the hose if needed. Lastly, using a water shutoff valve when finished and avoiding stretching or contorting the hose too much can help to conserve water and prevent flooding.
How To Cut A Garden Hose
Introduction
It is important to know how to properly cut a garden hose for a variety of reasons. Whether you need to install a new piece of hose, repair an existing piece, or replace a broken connector, having the skills to cut a garden hose will make the job much easier. In this article, we will take a look at 8-12 topics related to cutting a garden hose, and explore each topic in greater detail. By the time you are finished reading this article, you should have all the knowledge and tools required to safely and effectively cut a garden hose.
Gathering the Necessary Tools
The first step when cutting a garden hose is to gather the necessary tools. Essential tools for this job include a sharp utility knife, a pair of scissors, and a hacksaw. Other helpful tools may include a pair of pliers, a ruler, or some form of marking device, such as a marker or pen. Additionally, you may want to have a pair of safety glasses or goggles handy to protect your eyes from any flying particles.
Marking the Hose
Once you have your tools on hand, the next step is to mark the spot where you need to cut the hose. For sharp turns or corners, it may be best to use a marker or pen to draw a guide line on the hose. For straighter cuts, a ruler can be used to ensure a straight cut. It is important to measure with precision when marking the hose, as even the slightest mistake can cause the hose to be cut unevenly.
Preparing the Hose
When you are ready to begin cutting the hose, it is important to prepare the hose properly. Start by running your hand along the hose and feeling for weak points or crimps. If any areas are found, carefully cut away these areas until the hose has a smooth, even surface. You may also want to consider cutting at an angle, as this will help to create a better seal around the connection.
Cutting the Hose
Once your hose is properly prepared, it is time to make the cut. There are a couple of different ways to go about cutting a garden hose, depending on the type of tool you are using. If you are using a utility knife or scissors, the most common way is to score the hose with the sharp blade, then gently twist the hose until it snaps apart. Alternatively, a hacksaw can be used for a more precise cut.
Using a hacksaw to cut the hose requires a bit of extra technique. Start by clamping the hose in place, using either a hose clamp or a pair of vise grips. Once the tool is secured, begin sawing along the marked line, using smooth, even strokes. With enough pressure, the hose should break apart along the cut line.
Finishing the Cut
Once the cut is complete, it is important to finish it properly. Start by running your hand along the cut edge of the hose and making sure it is smooth and even. If there are any jagged edges, use a file or sandpaper to smooth them down. Finally, use a pair of pliers to seal the hose back together. This should help to ensure a secure and water-tight connection.
Summary
Cutting a garden hose is an essential skill to have when it comes to gardening and other outdoor activities. By gathering the necessary tools, taking the proper precautions, and following the steps outlined in this article, you can easily and safely cut a garden hose with minimal hassle. With the right knowledge and tools, you can have the job done in no time.
Previous Page