Cleaning Leather Gloves How-To Guide for Gardeners
How To Clean Leather Gardening Gloves
How to Clean Leather Gardening Gloves: A Step-by-Step Guide
Whether doting over your garden, working on a DIY project, or even just picking up around the yard, wearing the right pair of gloves is essential. Leather gardening gloves offer protection and complete dexteritybut you'll need to clean them routinely to protect their integrity and performance. Here is a step-by-step guide to cleaning leather gardening gloves.
Step 1: Inspect for Damage
Before cleaning your gloves, inspect for any signs of damage such as tears, cuts, or scuffs. Check for wear and tear around the finger joints. If any leather has been broken, it's time to invest in a new pair of gloves.
Step 2: Remove the Dirt
To remove the dirt, mud, and other debris from your leather gloves, place them in a basin of warm water. Gently scrub away the dirt with a soft bristled brush. Do not use hard bristles as these may scratch the leather and cause it to become brittle. Make sure to get inside all of the sides and crevices, being careful not to damage the stitching or the leather itself.
Step 3: Clean with Leather Soap
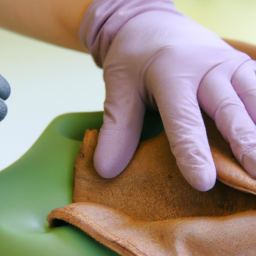
Once you've removed the dirt from the leather, it's time to clean them with a leather soap. For this step, use a soft cloth or a sponge dipped in lukewarm water with a few drops of leather soap. Gently scrub the glove to remove any remaining dirt. If necessary, you can also buff the leather with a soft cloth to remove any remaining dirt.
Step 4: Neutralize the Soap
To neutralize the soap, rinse the glove in hot water to remove any remaining residue from the leather soap. You should also use a clean cloth to remove any soap suds.
Step 5: Condition the Glove
Once you've neutralized the leather soap, it's now time to condition the glove. For this step, you'll need a leather conditioner. Lather the conditioner onto a soft cloth and rub it into the glove. Allow the conditioner to soak in for 15-20 minutes before wiping away any excess.
Step 6: Dry the Glove
Once you're done conditioning the glove, it's now time to let it dry. Place the glove on a flat surface away from any direct sunlight or heat sources. Allow the glove to air dry, this could take up to 12 hours.
Step 7: Store the Glove
Finally, it is important to store the glove properly when not in use. To do this, fill a cotton sock or other soft cloth with sawdust or cornstarch and place the glove inside. Alternatively, you can store the glove in an airtight plastic bag.
Brief Recap
Cleaning a pair of leather gardening gloves is a relatively simple process. Start by inspecting for any signs of damage, then remove the dirt by scrubbing them in lukewarm water. Use leather soap to clean the glove, then rinse the glove and neutralize the leather soap. After that, condition the glove and let it air dry before storing it in a cotton sock or in an airtight plastic bag.
Now that you know how to keep your leather gardening gloves in good condition, you'll be able to enjoy all the advantages they have to offer. Leather gloves may cost a bit more, but they provide the best protection and offer superior dexterity, making them the ideal choice for any gardening, DIY, or outdoor job.

Previous Page
Next Page